How to Use a Timer Switch
Table of Contents
ToggleWelcome to a guide on how to make the most of your timer switch, also known as a switching timer or automatic light switch with a timer.
Whether you’re looking to set up a timer switch for outdoor lights or explore the versatility of a timer for a wall switch, this walkthrough will help you navigate the process with ease.
Learn the simple steps to program your timer switch and enhance the convenience, energy efficiency, and automation in your home.
Let’s delve into the world of timer switches and discover how they can effortlessly manage your lighting schedules.

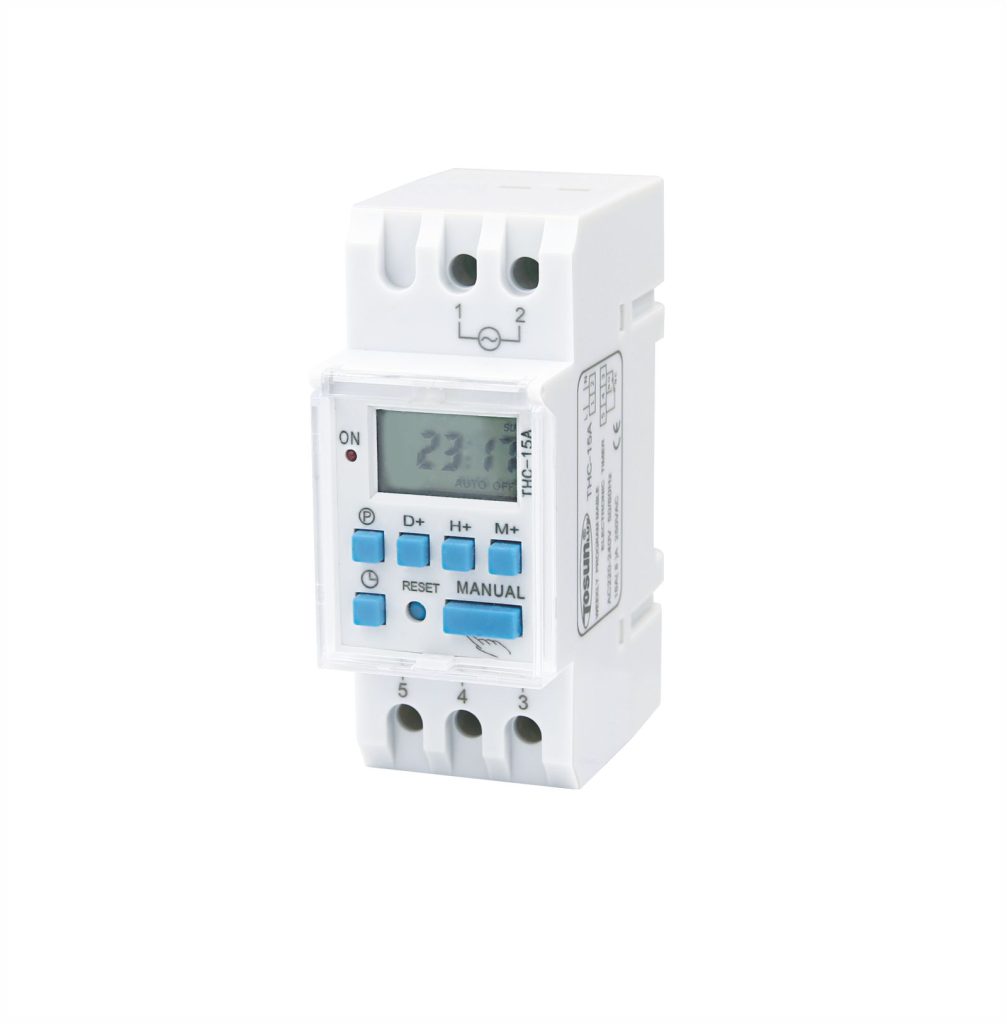
Timer THC-15A
How to Use or Set a Switching Timer
Using a timer switch is a straightforward process.
By following these steps, you can easily set up and enjoy the convenience of automated control for your electrical devices.
Here’s a step-by-step guide on how to use a timer switch:
Step 1: Plug In Your Device
Connect the electrical device you want to control (like a lamp or fan) to the timer switch.
Step 2: Set the Current Time
Adjust the timer switch to the current time. Mechanical ones often have rotating knobs, while digital ones use buttons for this step.
Step 3: Program On Time
Decide when you want your device to turn on. Set the timer switch to the desired start time.
Step 4: Program Off Time
Choose when you want your device to turn off. Set the timer switch to the desired stop time.
Step 5: Check Additional Features (if any)
If your timer switch has extra features like weekday/weekend settings or countdown options, adjust them accordingly.
Step 6: Activate the Timer Switch
Some switches have a manual switch or button to turn the timer function on. Make sure to activate it.
Step 7: Review and Adjust
Double-check your settings to ensure they match your preferences. Make adjustments if needed.
Step 8: Wait for Automation
Let the timer switch do its job. Your device will now turn on and off automatically based on the programmed schedule.
How to Install a Timer Switch
Installing a timer switch can enhance energy efficiency and automation in your home.
Important: Always follow safety guidelines, and if you’re unsure, consult a professional electrician for assistance.
Here’s a simple guide on how to install a timer switch:
Step 1: Turn Off Power
Before starting, turn off the power to the electrical circuit at the circuit breaker to ensure safety.
Step 2: Remove Existing Switch
Unscrew and remove the existing switch from the electrical box using a screwdriver.
Step 3: Check Wires
Check the wires connected to the existing switch. You should typically find a black (hot) wire, a white (neutral) wire, and a ground wire.
Step 4: Disconnect Wires
Carefully disconnect the wires from the existing switch by loosening the screws holding them in place.
Step 5: Connect Wires to Timer Switch
Connect the black wire to the “hot” terminal, the white wire to the “neutral” terminal, and the ground wire to the ground terminal on the timer switch.
Follow the manufacturer’s instructions for your specific timer switch model.
Step 6: Secure the Timer Switch
Secure the timer switch in the electrical box using the provided screws. Make sure it fits snugly.
Step 7: Turn On Power
Turn the power back on at the circuit breaker.
Step 8: Set Current Time
If it’s a digital timer switch, set the current time following the manufacturer’s instructions.
Step 9: Program On and Off Times
Program the desired on and off times for your electrical device using the timer switch controls.
Step 10: Test the Timer Switch
Test the timer switch by manually turning it on and off to ensure it operates correctly.
Step 11: Final Checks
Double-check all connections and ensure the timer switch is securely installed. If everything looks good, you’re done!
Key Takeaway
Whether setting up outdoor lights or wall switches, this guide simplifies the process, emphasizing convenience, energy efficiency, and automation.
With these features in mind, industries can embrace the transformative power of timer switches in optimizing their daily operations.
Recommendation
The THC15A Programmable Periodic Timer Switch is a handy Digital Timer Switch. It helps you schedule when your devices, like lights or fans, turn on and off automatically.
This not only makes things convenient but also saves energy. You can set it to work for specific time intervals, from seconds to weeks, and it even has a countdown function.
Plus, it can handle different devices with electrical loads up to 30 Amps.
So, it’s like a smart helper for your appliances, making sure they work when you want them to and saving energy in the process.
To learn more, visit the TOSUNlux website today.
Tel: +86-577-88671000
E-mail: ceo@tosun.com
Skype: tosunelectric
Wechat: +86-139 6881 9286
WhatsApp: +86-139 0587 7291
Address: Room No.1001 Wenzhou Fortune Center,Station Road, Wenzhou, China
REQUEST A QUOTE
WhatsApp us
 : +86-139 0587 7291
 English
 Español
 Русский
 Français
 العربية
 Português do Brasil
 Українська
 Türkçe
 Polski
 Nederlands
 Italiano
 Bahasa Indonesia
 हिन्दी
 اردو
اردو አማርኛ
አማርኛ Հայերեն
 ไทย
ไทย Монгол
 فارسی
فارسی Shqip
Shqip Ελληνικά


